- Terrazzo is a versatile material consisting of a mixture of binders and colorful chips.
- Materials for DIY terrazzo: Jesmonite, pigments, silicone molds, sandpaper, and protective gear to create bowls, coasters, or decor.
- Step-by-step instructions: First create the flakes, then mix and pour the terrazzo base, let it dry, and sand it down—your individual masterpiece is ready.
- Diverse DIY ideas: You can design terrazzo bowls, coasters, flower pots, candle holders, and more according to your own vision.
- Join my Terrazzo workshop in Berlin and design a decorative object of your choice.
Tired of boring home decor? Me too!
I’m Jennifer, the founder of Wow Space in Berlin, and today I’m going to show you how to make your own terrazzo pieces. Terrazzo is not just a real eye-catcher; it’s also a wonderful way to express your creativity. So grab a cup of coffee, get comfortable, and let’s get started together!

What is Terrazzo?
You might be asking yourself: "What exactly is terrazzo?" Terrazzo has its roots in ancient Greece and was later adopted and further developed by the Romans. Originally, Venetian workers in the 15th century used terrazzo to beautify their homes affordably using leftover marble chips. These chips were embedded in clay (and later cement) to create durable and decorative flooring. Terrazzo became especially popular during the Italian Renaissance and spread from there worldwide. It’s fascinating how long humans have been getting creative with materials, isn’t it?
Put simply, terrazzo is a composite material made from a mixture of binders (like cement or, in our case, Jesmonite) and small, colored stones or flakes. By sanding the surface, the characteristic colorful patterns emerge, making every piece of terrazzo decor unique.
What do I need for DIY terrazzo?
Before we start, here is a small checklist of materials and tools for your project:
Jesmonite powder and liquid: An eco-friendly, water-based composite. Pigments: To make your terrazzo shine in your favorite colors. Silicone molds: Depending on what you want to create (e.g., coasters, bowls, or flower pots). Tools: Scale, mixing containers, stirring sticks, plastic sheet. Sandpaper: For the final finish. Optional: Wax or sealer for protection. Safety gear: Apron and gloves as needed—let's keep the mess under control.

Make your own terrazzo: A step by step guide
Follow this terrazzo tutorial to create your first custom piece:
1. Creating the Terrazzo Flakes
Weighing the ingredients
Weigh the Jesmonite liquid and powder in two separate containers. The mixing ratio should always be exactly 1 to 2.5 (e.g., 20g liquid to 50g powder).

Coloring the liquid
Add pigments to your liquid and mix well until you are happy with the color intensity.

Mixing the components
Gradually add the powder to the colored liquid, stirring continuously until you have a smooth mass. Watch out: a time window is opening! The two components react and start to harden after about 3 minutes. So, don’t stir for too long.
Spreading the mixture
Spread the mixture onto a plastic sheet. It’s best to spread it out as thinly as possible.

Drying and crumbling
Let the spread-out mass dry for about 10 minutes. Now comes the fun part: crumble the dried mass into small pieces—those are your terrazzo flakes. Tada!

2. Create your terrazzo jewelry piece
Weighing powder and liquid
Weigh the powder and liquid again. Remember the mixing ratio of 1 to 2.5.
Coloring the liquid
Dye the liquid in your desired base color.

Add terrazzo flakes
Weigh out your flakes and have them ready.
Mix powder, flakes, and liquid
First add the powder and then the flakes gradually to the liquid and stir everything well. Remember that you only have 3 minutes before the terrazzo mixture sets.
Pouring terrazzo
Pour the terrazzo mixture into your silicone mold.
Removing air bubbles
Tap the mold lightly so that air bubbles can escape from the liquid terrazzo mixture.
Allow terrazzo to dry
Now it's time to be patient: let your terrazzo work harden for about 20 minutes.
Sanding and varnishing terrazzo
Carefully remove your piece of jewelry from the mold. Sand the surface in a water bath until it is nice and smooth and the flakes are visible. If you like, you can finish your terrazzo jewelry with wax or varnish.
Terrazzo ideas: What can I make with terrazzo?
The possibilities for what you can make with terrazzo are almost endless! Here are a few ideas to get you started:
- Terrazzo decorative bowl
- Terrazzo coasters (round or square)
- Terrazzo flower pot or pen holder
- Terrazzo candle holder
- Terrazzo soap dishes
- Terrazzo jewelry
- Terrazzo trays in various sizes
- Terrazzo pen and cell phone holders
- Terrazzo incense holders
- Terrazzo clocks in various sizes...
and much more!


Can terrazzo be repaired?
Don't worry if something goes wrong! Terrazzo is usually easy to repair. Minor chips can be repaired with stone adhesive. If an object breaks completely in two, you can put it back together and fill it with a new mixture of Jesmonite. This creates a whole new work of art. This can also be used as a stylistic device.
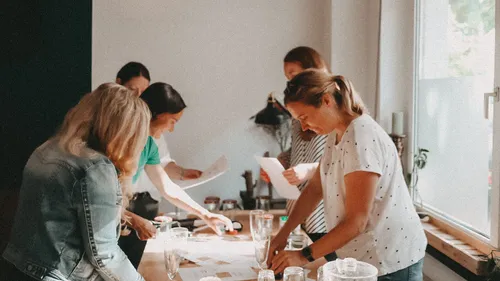
Want more? Come to my workshop in Berlin!
If you're now keen to delve deeper into the world of terrazzo, then my three-hour terrazzo workshop is just the thing for you! And the best part is, you won't mess up your place, and I'll take care of the cleanup.
What you can expect:
- A warm welcome and a brief theoretical introduction.
- Joint design: You mix your own color palette and learn all the basics.
- Support: I will be on hand to offer advice and assistance.
- Relaxed breaks with snacks and refreshments.
- Approx. 30 different shapes to choose from:
- Jewelry trays
- Coaster sets (round or square)
- Flower pot/pencil cup
- Candlestick set
- Various trays
- Pen and cell phone holders
- Soap dishes
- Incense stick holders
- Terrazzo clocks in various sizes
- And more

Making terrazzo yourself – conclusion
Terrazzo is really fun! Whether you want to create something beautiful for your home or simply get creative again, give it a try and be inspired by the possibilities.