- What Do I Need for Texture Paste Painting?
- Can You Make Texture Paste Yourself?
- How Do I Colour Texture Paste?
- Step-by-Step Guide: How Do I Paint with Texture Paste?
- What Techniques Are There for Painting with Texture Paste?
- Texture Paste Ideas for Inspiration: What Can I Paint with Texture Paste?
- Is Texture Paste Waterproof?


Painting with texture paste – the most important things at a glance:
- Making texture paste yourself: Texture paste can be made at home in just a few simple steps.
- Texture paste techniques: There are various techniques you can use when painting with texture paste. Examples: palette knife technique, stencil technique, mixing in materials, layering.
- Ideas for art with texture paste: Abstract landscapes, floral motifs, portraits, geometric shapes, and more.
- Waterproofness of texture paste: Texture paste is generally waterproof once it has dried.
The world of art offers you endless possibilities to express yourself and let your creativity flow. One technique that has grown enormously in popularity recently is painting or working with texture paste. With this method, you can create unique and fascinating abstract pieces that captivate through their texture and depth.
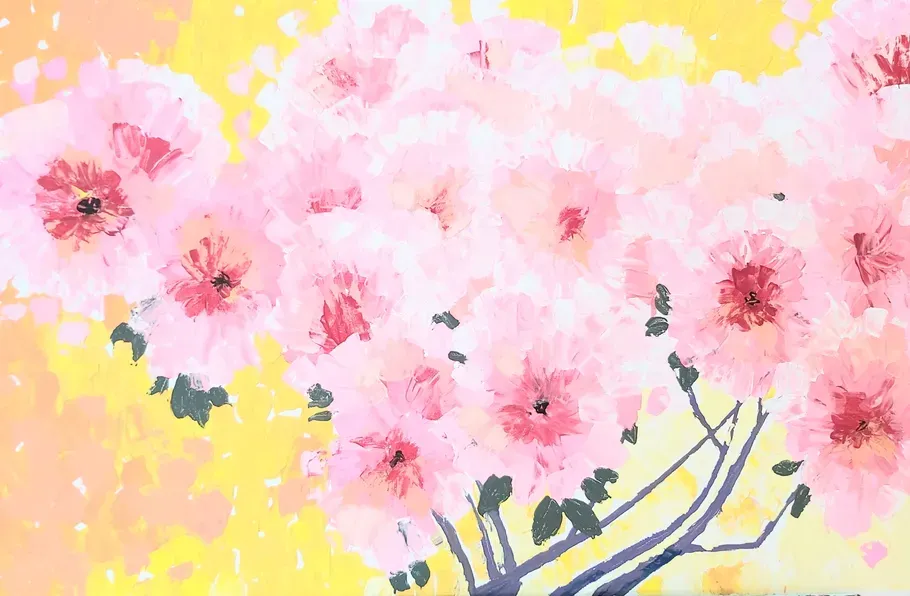
Here is my step-by-step guide on how to paint an abstract artwork.
In this article, you will find everything you need to know about working with texture paste.

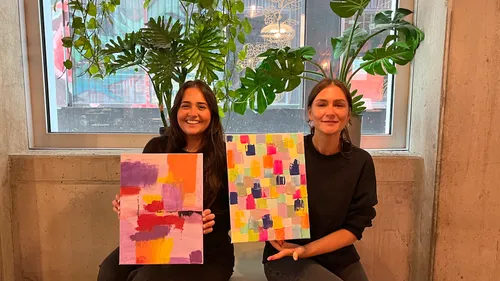
Abstract painting class in Munich
What Do I Need for Texture Paste Painting?
For painting with texture paste, you will need a few basic materials:
- Texture paste, available from art supply stores or DIY shops
- A surface to paint or work on – canvases are particularly well suited to this technique as they are robust enough to hold the texture paste, though other surfaces such as wood or cardboard are also possible
- Paintbrushes
- Paints – for example acrylic paints
- Optional: palette knife, pencil for sketching, sponges for blending

Can You Make Texture Paste Yourself?
Yes, you can make texture paste at home. It is relatively straightforward to make and can be created using various texture-giving materials. Try experimenting with sand or earth to find out which mixture works best for you.
Here is a simple guide to making your own texture paste:
Base Recipe for Homemade Texture Paste:
Ingredients:
- 1 part fine plaster or filler powder
- 1 part white glue (PVA glue)
- Acrylic paint (optional, for coloured paste)
- Water (as needed)
How to Make Texture Paste – Instructions:
- Mix: Start by combining the plaster or filler powder with the white glue in a clean container. This mixture forms the base of the texture paste.
- Determine consistency: Slowly add water until the desired consistency is reached. For thicker textures, aim for a firmer consistency; for finer details, the paste can be slightly more fluid.
- Add colour: If you want your texture paste to have a specific colour from the start, you can add acrylic paint now. Add the paint in small amounts until the desired shade is achieved.
- Test and adjust: Test the paste on a piece of cardboard or another practice surface. If the consistency or colour is not quite right yet, you can adjust by adding a little more water, for example.
- Start applying: The homemade texture paste can now be applied to the canvas or chosen surface using a palette knife, brush, or other tools. Let your creativity run wild!
Good to know:
- Homemade texture paste should be used relatively quickly, as it may dry out or change consistency over time depending on its composition.
- For additional effects, you can work sand, sawdust, or other fine materials into the paste before applying it.
How Do I Colour Texture Paste?
Texture paste can easily be coloured with acrylic paints. Simply add the desired paint to the texture paste and mix well until the desired colour intensity is achieved.
Abstract painting class in Munich
Step-by-Step Guide: How Do I Paint with Texture Paste?
In just six steps, you can paint your very own artwork with texture paste. Here is how:
Step 1: Prepare your canvas
Start with a clean, dry surface such as a canvas in your desired size. If you like, sketch your design lightly in pencil first so you know exactly where you want to apply the texture paste.
Step 2: Prepare your texture paste
Take your texture paste and mix it with acrylic paint to achieve your desired colour and consistency. This is where you can get creative with your colours. You can also apply the pure texture paste first and paint over it with colours later.
Step 3: Start applying the texture paste
Apply the texture paste to the surface using a palette knife or brush. You can apply it thickly or thinly – it all depends on the effect you want to achieve. Then shape the paste with the palette knife or other tools to create interesting textures and patterns.
Step 4: Let the texture paste dry
Allow your textured layer to dry completely on the canvas. Depending on the thickness of the paste, this can take up to 24 hours.
Step 5: Create your abstract texture paste artwork
Once the paste is dry, you can paint over the texture with acrylic paints or other colours to bring depth and colour to your piece.
Step 6: Finish your artwork
In the final step, let your artwork dry completely. You can then add final details or highlights to emphasise the texture or bring out certain elements. If you like, you can finish your piece with a gloss or matte varnish and frame it.
How Long Does Texture Paste Take to Dry?
The drying time of texture paste depends on several factors, including the thickness of the applied layer, the ambient temperature, and the humidity. As a general rule, it takes several hours for the paste to dry completely. If the texture paste has been applied thickly to your canvas, drying can take up to 24 hours.
What Techniques Are There for Painting with Texture Paste?
The techniques range from subtle textural effects to dramatic, three-dimensional creations. Here are some exciting techniques you can use to bring your artworks to life:
Palette Knife Technique
This technique involves using a palette knife or spatula to apply the texture paste directly to the canvas. You can smooth the paste to achieve a fine texture, or apply it in thicker layers to create bold, relief-like effects. Experiment with different knife movements to generate unique patterns and textures.


Stencil Technique
With stencils, you can incorporate precise shapes and patterns into your work. Place the stencil on the canvas and apply the texture paste over it using a palette knife or spatula. Once the stencil is removed, the pattern remains visible in the paste. This technique is ideal for creating targeted accents or repeating motifs.
Mixing in Materials
By mixing in additional materials such as sand, small stones, beads, or even dried flowers into the texture paste, you can achieve interesting visual and tactile effects. These materials add a unique depth and texture to your artwork.
Layering
With this technique, you apply multiple layers of texture paste, allowing each layer to dry before the next is added. This creates complex, multi-dimensional surfaces. You can apply different colours between the layers to achieve additional visual effects.
Impression Technique
Here, you press objects (such as leaves, pieces of fabric, or nets) into the wet texture paste to transfer their textures. Once the objects are removed, a detailed imprint remains. This technique is great for incorporating natural or industrial textures into your artwork.
Painting with Texture Paste
In addition to applying paste with palette knives or tools, you can also use texture paste with brushes to create relief-like lines and details. This technique takes a little practice as the paste is thicker than regular paint, but it allows you to paint directly with texture.
Texture Paste Ideas for Inspiration: What Can I Paint with Texture Paste?
The possibilities for what you can create with texture paste are truly endless! You can use it to craft abstract landscapes, modern designs, floral patterns, or even abstract portraits. Let your imagination run free and experiment with different textures and colours.
Ideas for Artworks with Texture Paste:
- Abstract landscapes: Use texture paste to create the illusion of rugged surfaces, hills, and valleys.
- City silhouettes and architecture: Use the paste to imitate the textures of buildings, streets, and bridges.
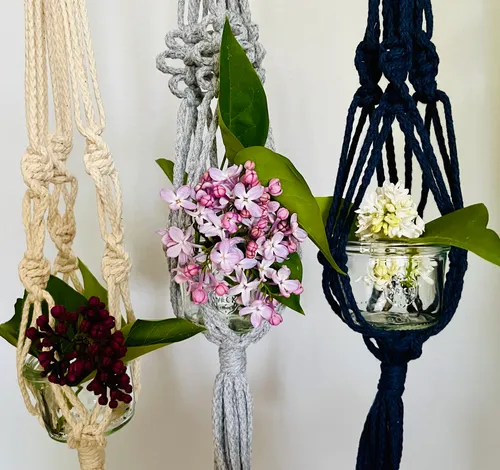
- Floral motifs: You can use the paste to paint petals and leaves with a relief-like effect.
- Geometric patterns and designs: Experiment with geometric shapes and patterns by applying the texture paste through stencils or working freehand with tools.
- Portraits with texture: Give portraits a new dimension by using texture paste to highlight particular features such as hair, clothing, or the background.
- Abstract texture experiments: Sometimes the best inspiration comes from simply playing with materials and techniques. Combine different application methods and materials with the texture paste to create truly unique abstract artworks.

To the abstract painting class in Munich
Is Texture Paste Waterproof?
Yes, texture paste is generally waterproof once it has dried completely. Once the texture paste has fully dried, the surface of the artwork can be treated with a suitable sealant. There are various types of sealants available, including spray and brush-on options, which form a water-resistant layer.

Painting with texture paste is an exciting and versatile technique that is enormous fun. Experiment with different materials and techniques to develop your own style. Get creative and let your imagination run free. Find the ideal one for you among 1,502 painting classes.