Make Your Own Cutting Board – Here’s How to Make Your Own Wooden Cutting Board
Table of contents
- 1. Which type of wood is best for a cutting board?
- 2. Materials List – What you’ll Need for your DIY cutting board
- 3. DIY Guide: How to Build Your Own Cutting Board
- 4. Which oil is best for cutting boards?
- 5. How often should you oil a cutting board?
- 6. Build Your Own Cutting Board at Woodboom in Berlin – A Truly Memorable Experience
- Make your own cutting board: Cut strips of wood, glue them together, shape them, and sand them smooth—and you’ve got your DIY wooden board. Find the instructions here.
- Cutting board wood: Maple, oak, or walnut are ideal – whether it’s a cutting board, breakfast board, or snack board, you choose the shape and size that suits your taste.
- Oiling your cutting board: Sunflower oil and linseed oil are particularly well-suited for oiling your wooden board.
- Workshop & gift: Visit the cutting board workshop at woodboom in Berlin, discover more wood workshops among over 55 experiences, or give a craft class gift card.
Do you want to make your own cutting board – a DIY project that’s not only beautiful but also practical? Then a homemade cutting board made of wood is just the thing. Whether as a gift or for your own kitchen—with a few tools, the right wood, and a little patience, you can create a truly one-of-a-kind piece. You will find even more inspiration in our wood workshops.
Would you rather try something hands-on at home? With our creative DIY kits, you can try out workshop ideas right at home. And if you would like to give someone a treat: with a craft class gift card, the recipient picks the experience they like best.
Which type of wood is best for a cutting board?

The wood you choose determines how hygienic and durable your wooden cutting board will be. If you want to make your own cutting board, you should opt for hardwood—ideally from local deciduous trees. The finer the grain, the more durable and hygienic the board will be for everyday use. Maple, oak, and walnut are particularly well-suited.
- Maple is light in color, has fine pores, is hard, and has a very calm appearance due to its uniform grain. The only downside: it’s prone to staining—but if you rinse your board immediately after use, you won’t have any problems.
- Oak is more robust but has coarser pores, which means it should be re-oiled more frequently. In return, it offers a natural, antibacterial effect—thanks to the tannic acid it contains.
- Walnut is not only beautifully dark with a lively grain but also easy to maintain. It is one of the most popular woods for high-quality cutting boards.
Important: You should definitely avoid using toxic or highly resinous types of wood. Even small wood particles can come into contact with food while cutting—but with the woods listed above, this is completely safe.

Materials List – What you’ll Need for your DIY cutting board
- Solid wood (e.g., maple, oak, or walnut)
- Mitre saw or table saw (alternatively, a circular saw)
- Planer & thicknesser
- Clamps
- Waterproof wood glue
- Sandpaper (grit 80, 100, 120)
- Sander or sanding block
- Old rag
- Oil or oil-wax mixture (food-safe)

DIY Guide: How to Build Your Own Cutting Board
A high-quality cutting board isn’t made from a single solid piece of wood—it’s better to cut the wood into strips and glue them back together. This helps prevent warping and ensures a sturdy final product.
How to build your own cutting board:
Step 1 – Cut the solid wood
Cut the wood into strips about 5 centimeters wide. These will later form the individual slats of your board.

Step 2 – Planing and Aligning
Carefully plane the individual strips on three sides—that is, two narrow sides and one wide side. You can then arrange the strips so that the grain and color match well. They should also lie flat against each other—this makes gluing them together later easier.
Step 3 – Gluing
Apply waterproof wood glue to the edges and press the strips together using screw clamps. Important: Applying even pressure from all sides ensures that no gaps form. Then let it dry.

Step 4 – Planing and Trimming to Thickness
Once dry, the wooden board is planed again. This means the surface is worked until it is flat and smooth—in other words, “planed.” As you do this, make sure all the glue joints are flush and that the board is the desired thickness. Now your DIY wooden board is slowly taking shape.
Step 5 – Shaping the board
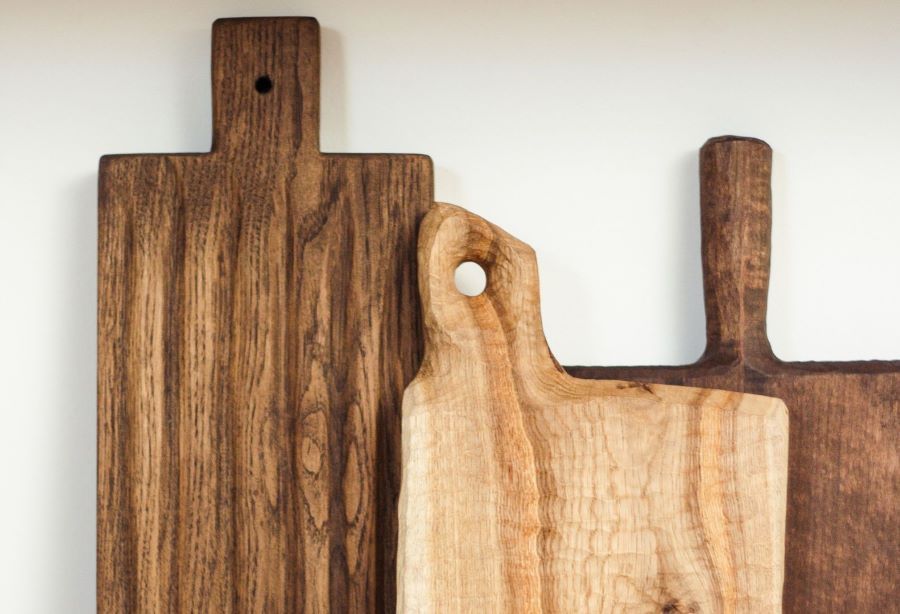
Now it’s time to get creative: You can make your own bread board by choosing the shape yourself—classic rectangular, oval for an elegant look, or round for breakfast. A saw will help you with this.
Step 6 – Sand, sand, sand
A good finish is everything. Sand the surface in several steps: Start with coarse sandpaper (80-grit), then move on to 100-grit, and finish with 120-grit—for a smooth, pleasant surface that’s a pleasure to cut on or serve from later.

Step 7 – Rounding the Edges and Finishing Touches
Optionally, you can round the edges of your cutting board. If you’d like to have a hole for hanging, now is the time to drill it.
Step 8 – Oiling the cutting board properly
Finally, oil your cutting board. Use food-safe oil for this. Apply it generously, let it soak in, and repeat the process if necessary. This will keep your wooden board beautiful and durable for a long time.

Which oil is best for cutting boards?
Not every oil is suitable for oiling a cutting board. Olive oil, for example, goes rancid quickly and doesn’t penetrate deeply enough. Better options are:
- Sunflower oil: Our favorite—it penetrates deeply, hardens the surface, and is flavorless.
- Linseed oil: Particularly long-lasting, but must be allowed to dry thoroughly.
- Oil-wax mixture: If you like, you can dissolve some beeswax in warm oil and treat the board with it—this provides additional protection for the surface.
How often should you oil a cutting board?
Proper care determines the board’s lifespan. As a general rule: It’s better to oil it too often than too rarely. If the wood looks dry or gray, it’s time for a new coat. Simply apply it with a soft cloth, let it soak in, and wipe off any excess. For heavy stains, salt and lemon juice help—then oil it again.
Build Your Own Cutting Board at Woodboom in Berlin – A Truly Memorable Experience
In our DIY cutting board workshop in Berlin, you’ll not only learn how to build a cutting board – you’ll also get to know wood as a material from the ground up. From the forest to the finished product, we’ll guide you every step of the way: You’ll work under professional guidance and with high-quality machines, all materials are provided, and you’ll build your own, one-of-a-kind cutting board—without any frustration from not having the right tools at home. Whether as a gift or for your own kitchen, your handmade cutting board will be truly one-of-a-kind. You will find more classes in the wood workshops in Berlin – and as a gift, the craft class gift card is a great fit.