- Acrylic pouring is a fluid art technique in which acrylic paints are mixed and poured onto a canvas.
- Acrylic pouring materials: acrylic paints, pouring medium, canvas, and a cup.
- The pouring medium is used to thin the paints so that the acrylic fluid technique works properly.
- The acrylic pour painting should dry for one to two days.
- The acrylic pouring technique creates unique abstract cells and marbling effects on the canvas.
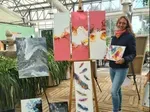
Acrylic pouring is a fascinating art form that has become increasingly popular in recent years. This technique uses liquid acrylic paints that are poured onto a canvas to create an abstract pattern. Have you ever tried it? With acrylic pouring, every painting becomes a completely unique, creative one-of-a-kind – and the best part is that anyone can create one.
What Is Acrylic Pouring?
Acrylic pouring is a special yet simple fluid art technique in which acrylic paints are mixed together and poured onto a canvas (or another painting surface). The process involves working with a larger quantity of paint directly on the canvas. By tilting, tipping, and swivelling the canvas, the pouring colours are blended together to create various patterns and designs. Depending on the acrylic pouring technique used, the paints are either poured directly onto the canvas or mixed in cups first and then tipped onto the surface. What makes acrylic pour painting so special is that the results are unpredictable. Every piece created with this technique produces unique abstract patterns.

What Is Pouring?
The technique of "pouring" in painting refers to the act of pouring or drizzling paint. Unlike conventional methods where paint is applied with a brush or palette knife, the paint here is poured directly onto the canvas. The skilful way in which multiple colours flow into and blend with each other creates fascinating marbling effects, giving this method its unique appeal.

What Materials Do You Need for Acrylic Pouring?
Various tools and materials are needed for acrylic pouring. To get started, you can use this list as a guide:
- Acrylic paints: acrylic paints in the colours of your choice. White acrylic paint is also recommended for interesting effects.
- Pouring medium: This liquid binding agent is used to adjust the consistency of the acrylic paints so that they flow better onto the canvas.
- A canvas: Ideally with a smooth surface so that the paints flow more easily.
- A cup: For mixing the different colours (plastic cups are ideal).
- Something to stir the paints: e.g. wooden sticks.
- Disposable gloves: To protect your hands from the paint and binding agent.
- Optionally a palette knife or painting knife: These tools can be used to spread the paint across the canvas afterwards.
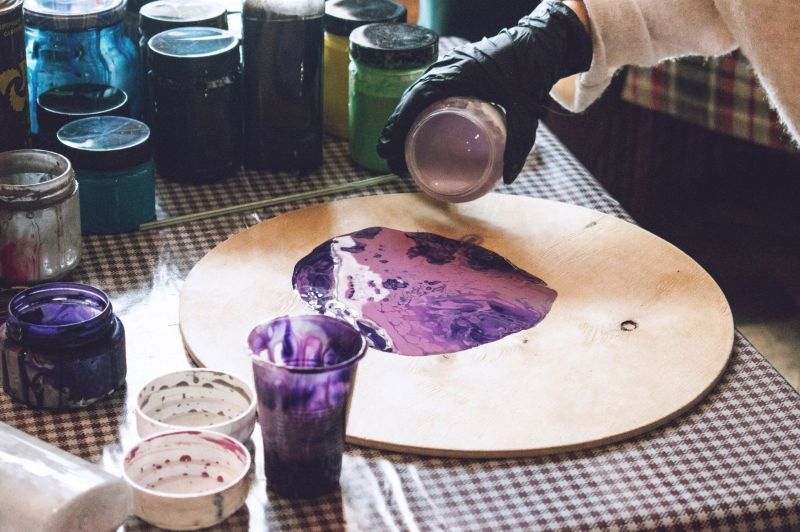
How Do You Mix Acrylic Paints with the Pouring Medium?
For the fluid technique to work, the paints need to be thinned. The best way to do this is with special binding agents made for acrylic pouring, known as pouring medium. The mixing ratio depends on the viscosity of the paints. As a general rule of thumb: mix the medium and the acrylic paint in roughly a 1:1 ratio – meaning you add as much acrylic paint to the cup as you do pouring medium. The ideal consistency is comparable to liquid honey. If the mixture is not fluid enough, a little water can be added.

Acrylic Pouring Step-by-Step Guide: How Do You Make an Acrylic Pour Painting?
- Prepare your workspace: Protect your work surface with a sheet of plastic, lay out all your materials, and put on your gloves. Place the canvas in the centre of your work area.
- Mix the colours: Choose the colours you want to use and mix them in separate cups with the pouring medium. Stir the mixture in the cup thoroughly until it is completely blended and has a fluid consistency.
- Pour the colours onto the canvas: Depending on the acrylic pouring technique you choose, bring the colours onto the canvas.
- Spread the colours: Tilt the canvas in various directions to distribute and blend the colours. You can also use a palette knife or painting knife to spread the colours and create patterns.
- Let the canvas dry: Leave the canvas flat so that it can dry properly.
How Long Does an Acrylic Pour Painting Need to Dry?
The painting is not finished until it is dry. Depending on the thickness of the paint layers, the paint needs adequate time to dry on the canvas – around 24 to 48 hours. To be safe, leave your finished acrylic pour painting to cure for up to 48 hours on a flat surface. This prevents the paint from continuing to spread across the canvas afterwards.

What Acrylic Pouring Techniques Are There?
There are many different techniques that can be used in acrylic pouring to generate different patterns, textures, and effects. Here are some of the most common:
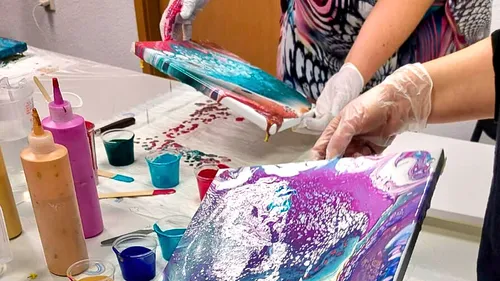
The Flip Cup Technique
With the flip cup technique, individual colours are layered in a single cup and gently blended together. The cup is then placed face-down on the canvas and slowly lifted up. For this technique, you should include the colour white. You can either add white directly into the cup or spread it generously around the cup on the canvas. Once the cup is lifted, the colours flowing out must be tilted back and forth across the canvas. This is how the acrylic pour painting is created.
The Dirty Pour Technique
With the dirty pour technique, the colours are also poured into a shared cup and gently stirred. However, unlike the flip cup, the cup is not turned upside down onto the canvas – instead, the colours are poured out directly. The canvas is then moved back and forth until the paint has spread evenly.
The Puddle Pour
With the puddle pour, the individual colours are not mixed in a shared cup first but poured directly from their individual cups onto the canvas. The second colour is poured directly into the first, the third into the second, and so on. The canvas is then tilted and moved to distribute the colours. With this acrylic pouring technique, a palette knife can be used to create great effects by connecting the colours together.

What Can Go Wrong with Pouring?
In general, acrylic pouring is a simple art form with which anyone can create unique artworks. However, there are a few things to avoid:
- Using too much paint: If you add too much paint to the canvas, the drying can be uneven and significantly longer.
- Mixing the paints and pouring medium incorrectly: If you use too much pouring medium, the consistency of the paints becomes too fluid, which makes blending more difficult.
- Not letting the finished painting dry for long enough: Make sure you allow your finished artwork to dry for long enough so that the fascinating patterns on the canvas are preserved.
Helpful Tips for Acrylic Pouring
Before you begin your own acrylic pour painting, here are a few final tips:
- Do not shake the paints: Air bubbles created by shaking can lead to uneven patterns.
- Wear clothes that can get paint on them: Wear suitable clothing and gloves to protect yourself from paint splashes and chemicals.
- Experiment: Try out different pouring techniques and colour combinations to create different patterns and textures.
- Clean your tools: As soon as you are finished, clean your tools straight away so that the acrylic paint does not dry on them.
Ultimately, acrylic pouring is suitable for anyone who wants to express their creativity. At the same time, unique abstract artworks are created that are truly worth seeing. Give it a try and let your creativity run free. Find the perfect offer for you from 1,502 painting classes.