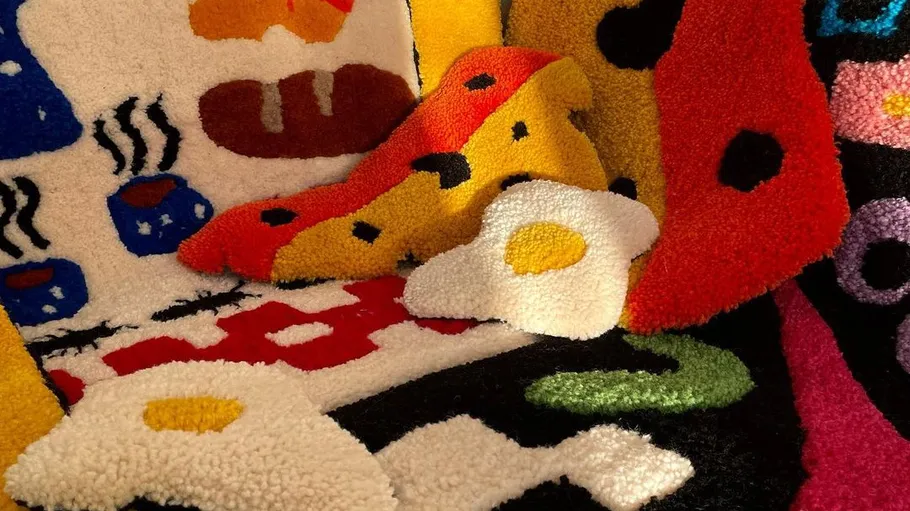

The DIY tufting trend has taken the world of social media by storm, and if you enjoy getting creative, tufting might be just the thing for you. Under the hashtag Tufting, you’ll find countless videos showing how to create rugs using a special tufting gun. These handmade works of art now adorn floors, walls, picture frames, mirrors, and even sofa cushions in homes around the world. The big advantage: You no longer have to rely on industrially manufactured rugs or go through a tedious weaving process. Instead, you can unleash your creativity and create a completely personalized rug to your taste in no time.
What is tufting?
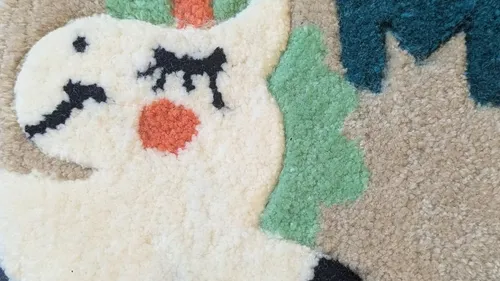
The term "tufting" comes from English and literally means "to decorate with tufts." This craft refers to the use of a tufting machine to make carpets. Tufting is comparable to sewing with wool. The tufting machine uses a needle to sew the yarn onto a tufting fabric from the back, creating small loops lined up next to each other on the front (also known as loop pile). Cutting these loops creates the familiar cut-pile carpet. By adjusting the height of the loops on the tufting machine, you can vary the pile height within your carpet pattern, creating a particularly interesting texture.

What do you need for tufting?
To get started tufting your own rug, you’ll first need a few essential tools:
- First and foremost is the tufting gun. It’s worth familiarizing yourself with the different models, which have evocative names like the Tufting Gun AK I Cut Pile, indicating that it can only produce cut loops and thus creates a high-pile rug. The Tufting Gun AK II (Loop Pile), on the other hand, leaves the loops intact, so they remain visible on the rug’s surface. Alternatively, the Tufting Gun AK III combines both techniques in a single device.
- A sturdy frame is also essential. You can either build a frame yourself—you’ll find plenty of instructions online—or buy a ready-made tufting frame.
- Another key component is the tufting fabric, also known as monk’s cloth. This serves as the base material onto which the tufting machine sews the wool.
- The choice of wool is flexible, as long as it fits through the needle hole of the tufting machine.
To make your rug usable, the individual yarn fibers must be glued to the back of the tufting cloth at the end, followed by the attachment of a backing.
- For this, you’ll need carpet adhesive; you can generally choose between latex, PVA, or PVC adhesive—the key is that the fibers are securely bonded and can’t be pulled out.
- A few other materials you’ll need include scissors, an anti-slip mat or other felt underlay, and either spray adhesive or a hot glue gun.
- To give your rug a personalized finish, you’ll also need a carpet trimmer and a carpet lint remover. With these tools, you can refine the final details and ensure that the colors and patterns of your handmade rug are shown off to their best advantage.

Step-by-step guide: How to tuft
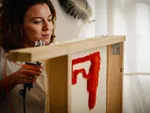
- Stretch the tufting fabric and secure the frame: Once you have all the materials for your tufting project, you can start designing your own rug. Stretch the tufting fabric tightly over the frame—the tighter it is, the easier the tufting process will be later. Secure the frame firmly to a table or lean it securely against the wall to prevent any wobbling or tipping over.
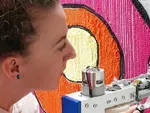
- Design your tufting rug: Come up with a design and sketch it onto the tufting fabric. A projector can help here by projecting your desired pattern onto the fabric, making it easier to trace. Then select your preferred yarn colors and prepare your tufting gun by threading the wool.
- Now comes the fun part: tufting! Using the tufting gun, you can create your desired pattern. Once you’ve finished the pattern, trim the excess threads and secure the fibers on the back with carpet adhesive. Let the adhesive dry thoroughly and air out.
- Cut the tufted rug to shape: Remove the tufting fabric from the frame and cut the fabric along the design, a few centimeters away from its outer edge. This is crucial to ensure your tufting project takes on the desired shape and size. Now fold the overhanging edge of the tufting fabric back and secure it to the back with a hot glue gun or spray adhesive. If desired, glue down a non-slip mat or other backing to cover the glued-down back.
- Marvel at your tufted rug: Now the moment has arrived—you can flip your tufted creation over and admire it. Use scissors to trim the yarn along the outer edge to achieve a neat and defined finish.
- Trim the yarn: For the finishing touch, use a trimmer to cut all the yarn strands to the same length. This step gives your rug an even, compact, and wonderfully soft surface.

What can you tuft?
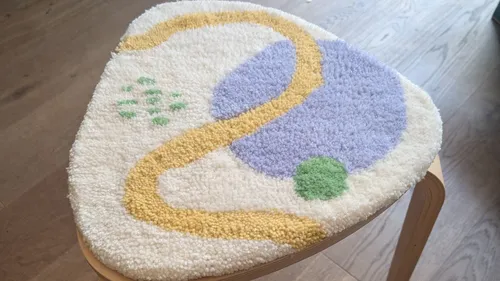
With tufting, there are no limits to your creativity, and the variety of projects you can create using this technique is impressive. From custom tufted rugs and wall hangings to artistic pillowcases and unique picture frames the possibilities tufting offers are virtually endless. You can design abstract patterns inspired by nature, geometric shapes, or even turn your favorite quotes into yarn. Tufting also offers the option of adding custom covers to existing furniture, such as armchairs or stools, to give your living space a personal touch. The flexibility of this craft technique makes it accessible to both beginners and experienced crafters alike, allowing your own creativity to become the defining design element.

Why should I try tufting?
DIY tufting projects let you add a unique, handmade touch to your home that sets it apart and gives it a personal, warm feel. You get to choose not only the design but also the materials and colors that go into your project. A tufting workshop offers the perfect opportunity to learn this fascinating craft alongside like-minded people, express yourself creatively, and have a lot of fun in the process.