- Resin art is an art form in which beautiful objects and works of art are cast using resin.
- Resin art ideas: jewelry, decorative items, coasters, wall art, and more.
- Resin and epoxy resin are very similar materials, but there are a few differences.
- Resin Art Materials: Epoxy resin and hardener, protective clothing, mixing cups and stirring sticks, base material, color pigments.
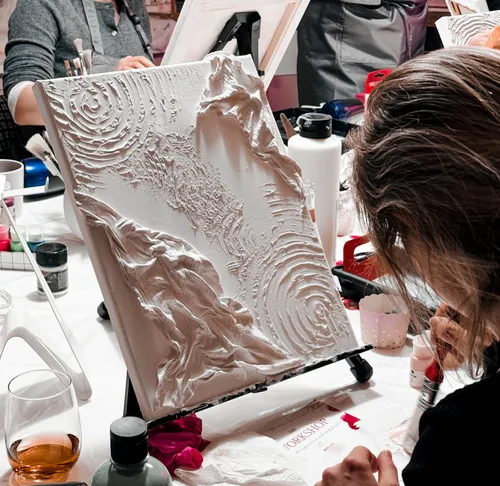
- In a Resin Art Workshop, you’ll learn step-by-step from an artist how to proceed and create your own resin art.
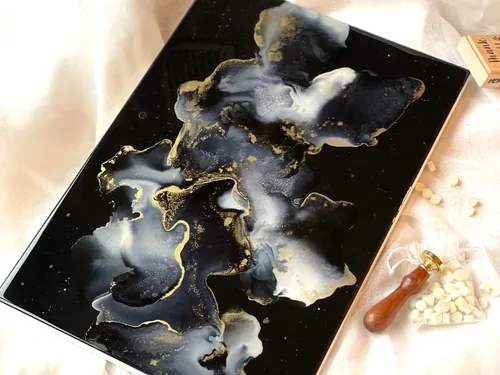
Resin art is an innovative art form that uses the versatility of epoxy resin to create impressive, three-dimensional works of art. By embedding objects or coloring the resin, unique and glossy effects are achieved.
What is Resin Art?
Resin Art is a relatively new art form. The trend originated in America. Resin Art is an art form that uses liquid epoxy resin as the primary medium to create artistic objects, jewelry, paintings, and decorations. By mixing the resin with colors, glitter, pigments, and even embedding objects such as flowers or photos, artists can create unique, glossy, and often three-dimensional works that captivate with their clarity, depth, and durability.
What is epoxy resin?
Synthetic resins, or epoxy resins, are two-component systems consisting of a resin and a matching hardener. When both components are mixed, a chemical reaction occurs. This results in a high-gloss, mirror-smooth surface after curing.

What can I create with resin?
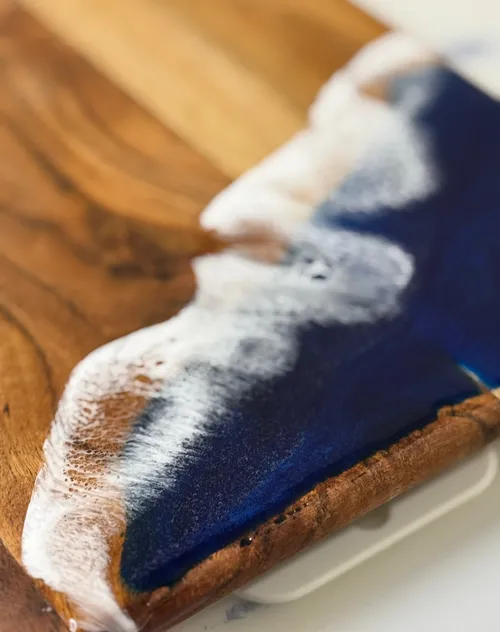
Resin art is a form of fluid art, also known as fluid painting. This type of art combines beautifully with alcohol ink art.
Highly pigmented alcohol ink colors can also be used for resin art, allowing for ever-changing color combinations.
Resin Art Ideas:
- Artwork - e.g., pieces with 3D effects
- Clocks
- Bowls or vases
- Jewelry and accessories - e.g., necklaces, earrings, bracelets, or hair clips (it's easy to make your own resin jewelry with the right tools)

Resin or Epoxy Resin?
Resin and epoxy resin are very similar materials, but there are a few differences.
Similarities and Differences Between Resin and Epoxy Resin:
Resin (synthetic resin) | Epoxy resin | |
|---|---|---|
Definition | General term for various types of synthetic resin. | Specific type of resin based on epoxy monomers. |
Materials | Can be made from polyester, polyurethane, or acrylic. | Consists of epoxy monomers mixed with a hardener. |
Applications | Often used in the arts, e.g., for finishing artwork or making jewelry. | Used for coatings, sealants, adhesives, and molds in crafts. |
Properties | Depends on the specific composition; often used for artistic projects. | High strength, resistance to heat (often formulated as heat resistant epoxy resin), chemicals, and wear. |
Surface finish | Can vary from matte to glossy depending on the type of resin. | Typically high-gloss and very clear, making it ideal for projects where the finish is important. |
Advantages for Art Projects | Versatile for use in creative applications. | Excellent clarity and easy to work with; particularly suitable for high-quality finishes. |
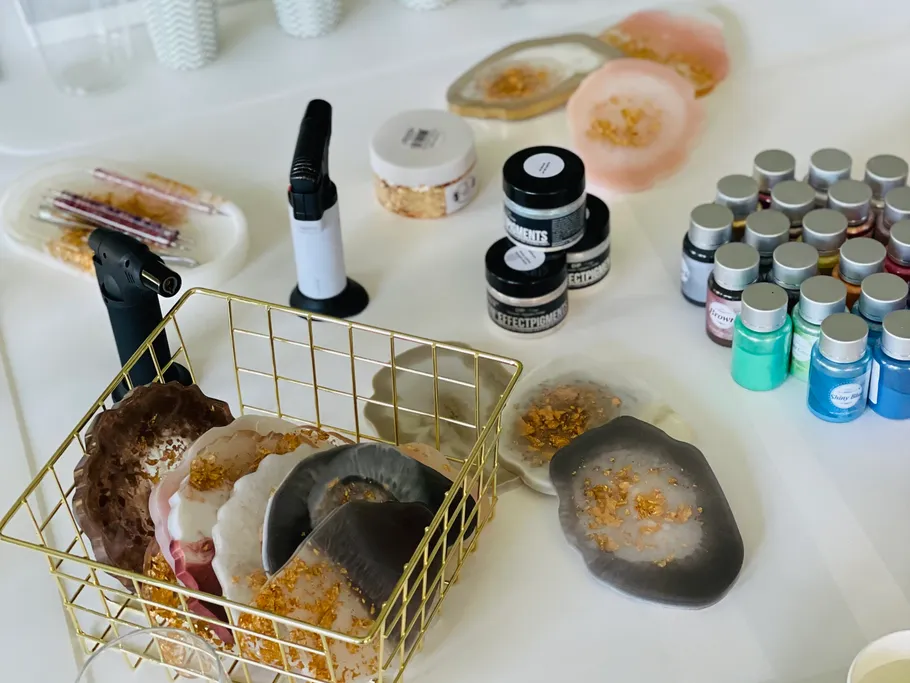
What do I need for resin art?
If you are wondering what materials for resin art you should get, here is a helpful list:
- Epoxy resin and hardener (preferably with UV protection)
- Gloves
- Mask (to protect against chemical fumes, which unfortunately aren’t visible) – if you plan to work with resin or epoxy resin frequently, please get a mask with a filter
- A work surface and paper towels
- A scale, mixing sticks, and a mixing cup
- Silicone molds for resin of your choice
- Epoxy resin color pigments, dyes, and powders for coloring the resin
- Glass beads or metallic leaf for stunning glitter effects
- A Bunsen burner or a heat gun to remove small lint particles or air bubbles
- Isopropyl alcohol—for wiping down the silicone molds and removing lint and dirt

Safety precautions when working with epoxy resin:
- Before you start working with Resin Art, you should put on gloves. Nitrile gloves are best, as they are less permeable than latex gloves.
- In any case, you should wear safety goggles to protect your eyes from possible splashes.
- As soon as you start mixing the resin, you should wear a mask to protect yourself from the chemicals. Ideally, use a respirator with a filter.
- The room where you are working should be well-ventilated. Please do not experiment with resin in your living room, bedroom, or children’s room.
DIY Resin Art - Step-by-Step Guide: How Does Resin Art Work? In resin art, colors and other materials are incorporated into epoxy resin to create unique, glossy, and often three-dimensional effects. Here is a simple step-by-step guide to help you get started in the world of resin art, making it perfect resin art for beginners:
Step 1: Preparation
Prepare your workspace by covering it with plastic wrap or newspaper. Wear protective clothing to protect your skin and clothes. Make sure your workspace is well-ventilated.
Step 2: Prepare the mixture
Mix the epoxy resin and hardener according to the manufacturer’s instructions. The ratio is usually 1:1 or 2:1. It is important to follow the instructions carefully. Stir the mixture thoroughly to ensure that the resin and hardener are fully combined.
Step 3: Add Color
Add color pigments or inks to your resin mixture. You can prepare different colors in separate cups to achieve various effects. Experiment with the amounts to achieve the desired opacity and color intensity.
Step 4: Pouring
Pour the colored resin onto your prepared surface. You can use various techniques, such as pouring in layers, swirling to blend the colors, or using tools to create patterns. If you want to create stunning beach designs, following an ocean resin art tutorial can be very helpful here. Keep in mind some essential tips for pouring epoxy resin: pour slowly and close to the surface to minimize bubbles.

Step 5: Remove air bubbles
Use a hair dryer or heat gun to gently move over the surface and remove air bubbles. Do not hold the device too close to the resin to avoid overheating or unwanted effects.
Step 6: Allow to cure
Let the artwork cure in a dust-free room. Curing time may vary depending on the product; generally, resin takes 24 to 48 hours to cure. Avoid touching or moving the artwork during this time.
Step 7: Finishing
Once the resin has fully cured, you can further refine your artwork, for example by sanding the edges or applying a protective varnish.
How did I discover resin art?
I discovered my love for colors through pouring, alcohol ink and acrylic art, until I stumbled upon resin art by chance and was immediately fascinated by its delicate and flowing nature.
So I began learning this art form through a Resin Art workshop and countless books and videos. Hardly a day went by without me presenting another new resin piece of jewelry to my family; ever since then, my heart has been set on epoxy resin art, and there is always something new for me to discover or learn.
It’s just so wonderful to bring a smile to people’s faces with your own artwork. With that in mind, I hope that you, too, can discover this joy for yourself during this little break.