Kintsugi - The Japanese Art of Ceramic Repair
- Kintsugi: The Japanese art of repairing ceramics with gold, highlighting break lines to celebrate imperfection.
- Kintsugi philosophy: Inspired by wabi-sabi teachings, which see beauty in transience and imperfection.
- Materials: Kintsugi adhesive, gold or bronze powder, filler compound, and special tools for the kintsugi technique.
- Join my kintsugi workshop and learn how to repair and refine ceramics the Japanese way.
Kintsugi, the fascinating Japanese art of repairing broken ceramics with gold, is far more than a technique - it's a philosophy of wabi-sabi that sees beauty in imperfection. This artful method celebrates an object's cracks and breaks, turning them into a valuable part of its story. With the right kintsugi adhesive, lacquer, and a bit of patience, you can learn how to turn your own broken bowls or vases into true works of art.
What does the word "kintsugi" mean?
The term "kintsugi" (Japanese 金継ぎ, "gold joinery, gold repair") is made up of two words: "kin" = gold, and "tsugi" = joint, and is the umbrella term for a technique in which break lines are highlighted with gold and treated as a valuable part of the repaired object.
Kintsugi has its roots in the Japanese Higashiyama culture, which around 250 years ago gave rise to many of the art forms we now consider typically Japanese. A Zen Buddhist-inspired love of simplicity ran through architecture, theater, music, and craftsmanship. The tea ceremony in particular developed further during this period, and with it, an appreciation for tea ceramics. Valuable tea bowls were passed down as family heirlooms, repaired rather than thrown away.

The most beautiful way to repair a tea bowl became the gold joinery, since in the gold you could trace the marks of the breaks and, with them, the life story of the tea bowl.

What's behind the kintsugi philosophy?
The philosophy we most associate with kintsugi is what's known as the "wabi-sabi philosophy." Wabi-sabi refers to an aesthetic (a perception of beauty) of the imperfect, defined by irregularity, roughness, and simplicity. A distinction can be made between wabi as the imperfection inherent to the making of an object, and sabi as the marks of age and use that shape the object over time. Examples of the latter include patina, wear, or even uncovered repair spots.
Just like mottainai, wabi-sabi is closely tied to Zen Buddhism and the way of life that goes with it: limiting yourself to what's necessary, living in the moment and in simplicity, rejecting every form of waste.
What do I need for kintsugi?
Materials you need for kintsugi:
- Adhesive - I recommend UHU porcelain adhesive or a comparable product. There's also a UHU instant adhesive for porcelain that works well - just be sure to follow the handling instructions on the packaging.
- Filler - a two-component repair compound. In my kintsugi workshop, I use the Repair Stick Aqua from Weicon, since the compound doesn't harden too quickly.
- Lacquer - a thick, natural lacquer that can be applied with a brush works well. I use amber lacquer in my workshop, since it comes closest to Japanese lacquer.
- Modeling tool
- Scalpel or sharp, thin utility knife
- Glass eraser
- Thin brush (ideally a lettering brush or "liner")
- Soft, fluffy brush (ideally a squirrel-hair watercolor brush)
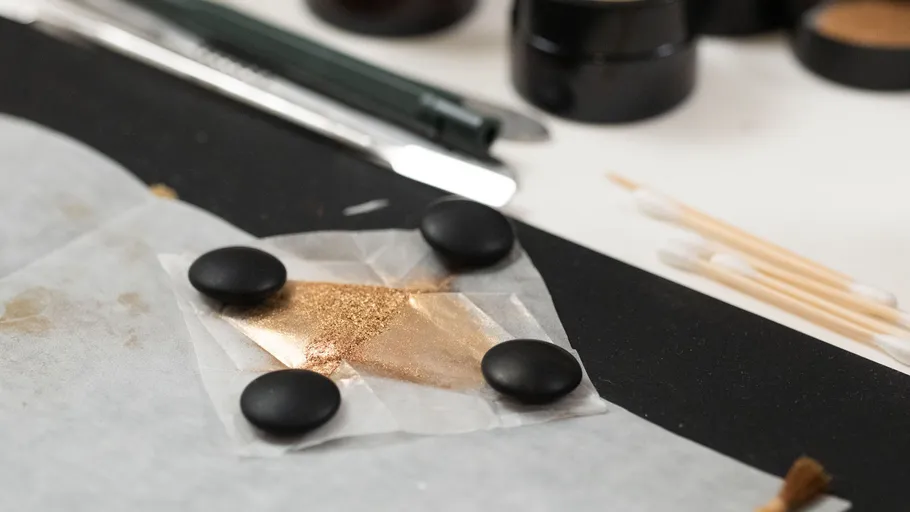
- Gold sprinkling powder - anything from real powdered gold to bronze powder to gold imitation can be used, any metal pigment (metallic color powder) works.
- Q-tips, a soft cloth, or paper tissue
- Alcohol & balsam turpentine oil for cleaning
- Gloves, mask, work apron
Optional materials and tools:
- Red color pigment - color pigments are available at art supply stores. Vermillion or iron oxide red work well here.
- Japanese filter paper (Yoshino)
- Wooden spatula and a work surface, ideally a smooth glass or plastic sheet
Doing kintsugi yourself - step-by-step guide
Kintsugi is a special Japanese art form and isn't the easiest thing to do yourself. In a kintsugi workshop, you'll learn under professional guidance how each step is properly carried out.
Below you'll find a step-by-step guide to doing kintsugi yourself.
Kintsugi Step 1: Preparation
- Clean the shards thoroughly, removing old adhesive and dirt from the break edges. Rough up the break edges with coarse sandpaper if needed.
- Assemble the object once "dry" to determine the order of gluing and get a feel for the finished piece. Tape the shards together using 10-15mm strips of tape (washi tape or narrow painter's tape) while doing this.
- Then take all the shards apart again.
 Photo: Josh Dyffort
Kintsugi Step 2: Gluing
- Apply porcelain adhesive thinly to both break edges with a spatula and let it dry for five minutes.
- Then apply another layer of adhesive to one of the break edges and press both shards firmly together.
- Check the fit of the shards and secure with tape.
- Wait 24 hours for the adhesive to fully harden.
 Photo: Uta Kargel


Kintsugi Step 3: Filling gaps
- Knead the two-component filler compound until it becomes uniform.
- Then apply it with a modeling spatula to any areas with chips or holes in the object.
- Wait 24 hours for the filler to fully harden.
 Photo: Uta Kargel
Kintsugi Step 4: Cleaning
- Carefully remove excess adhesive with a scalpel or sharp knife. At the filled spots, roughly carve the excess filler compound into shape with a scalpel or knife.
- Then sand down the cracks and filler with a glass eraser until the surface is as smooth and even as possible.
- Be careful not to damage the glaze: test the knife and glass eraser beforehand on an as-inconspicuous-as-possible spot on the bottom of the piece.
- Most glazes aren't damaged by these tools, but the test is still worthwhile.
- Always use the glass eraser with water so no glass dust is created. It's advisable to wear a mask and gloves while doing this.
 Photo: Uta Kargel
Kintsugi Step 5: Tinting the lacquer
- Mix amber lacquer with a red color pigment (iron oxide or vermillion) in a 1:1 ratio.
- Put the mixture into a small filter paper and wring it out to avoid clumps.
 Photo: Uta Kargel
- Alternatively, an already-tinted lacquer can be used. A thick, natural lacquer is recommended.
Kintsugi Step 6: Applying the intermediate lacquer layer
- Apply the filtered lacquer broadly and evenly over the break edges and filled areas, and let it dry for 24 hours. Then sand it down with the glass eraser.
- This first lacquer layer serves to fill in fine chips and unevenness along the break edge with lacquer.
- If unevenness remains afterward, one or more additional lacquer layers can be applied.
 Photo: Uta Kargel
Kintsugi Step 7: Finishing
- Carefully apply a thin final lacquer layer with a long, narrow brush (lettering brush or liner) and let it dry for 30 minutes.
- Then pick up the metal pigment (bronze powder or powdered gold) with a soft brush and sprinkle it onto the still-damp lacquer layer.
- Lightly brush over the line to embed the pigments into the lacquer.
- Wait 24 hours for the lacquer layer to fully harden.
 Photo: Uta Kargel
Kintsugi Step 8: Finishing touches
- Remove the excess metal pigment first with the sprinkling brush, then with a soft cloth.
- Carefully remove any remaining residue with a Q-tip or paper towel and water, avoiding the cracks as much as possible. Lacquer residue can be cleaned well with isopropanol (alcohol).
 Photo: Uta Kargel